
🎬 What is Photorealism?
Photorealism is an art that makes 3D renderings look so detailed and natural that they are indistinguishable from real photographs. Originally, this concept emerged with the development of digital art in the 1970s. Today, it is used across a wide range of fields, from cinema to architecture, and from games to product design. For instance, the ability to present an architectural project before it is built, or for digital characters in a movie to seamlessly interact with real actors, highlights how critical the quality of rendering is. Ultimately, “believability” becomes the key to connecting the audience to the story or product.

🖥️ Cornerstones of Digital Photorealism
Creating Realistic Light in 3D Renders with HDRI Lighting
One of the most critical steps in Photorealistic Rendering Techniques today is the use of HDRI lighting. Specifically, HDRI (High Dynamic Range Imaging) allows artists to simulate realistic lighting environments by using real-world captured high dynamic range images. These images, containing a wide spectrum of light information, enable more accurate reflections, shadows, and overall illumination. By leveraging HDRI in your workflow, you can instantly elevate the realism of your 3D scenes—making them feel grounded, immersive, and visually compelling.
What is HDRI Lighting?
HDRI lighting works like a sphere of light that surrounds your 3D scene. Unlike traditional lighting setups, HDRI maps naturally transfer sunlight from the sky, clouds, buildings, and all reflections from the surroundings into the scene. As a result, this method accurately simulates the interaction of light with surfaces and produces natural shadows, color splashes, and realistic reflection effects.

Advantages of Using HDRI
Natural Lighting: Instead of manually adjusting light sources, you use the light data of a real environment.
Fast and Efficient: Especially in outdoor scenes, you can get realistic results in seconds with HDRI.
The Power of Reflections: Especially on metallic and glossy surfaces, HDRI provides stunning realism.
How to Setup HDRI Lighting in 3D Renders?
- Obtain a high-resolution HDRI file (.hdr or .exr format).
- Load the HDRI map into Environment Lighting or Sky Dome in your 3D software.
- Control the dramatic effect of your scene by adjusting the direction of the light.
- Fine-tune the Exposure and Gamma values if necessary.
Websites that publish hdri content for free: Poly Haven , HDRI Skies , HDRMaps , ambientCG
Things to Consider When Using HDRI Lighting
- Excessive brightness or flat contrast can ruin the naturalness of your scene.
- Poor quality HDRI files can create noise in your renders.
- Supplementing HDRI with proper grading and color grading will ensure professionalism in your final image.
Conclusion
HDRI lighting is an indispensable tool if you want to create realistic light in 3D projects and bring your scenes to life. The use of HDRI takes render quality to the next level in both professional architectural visualization and game design scenes.
Achieving Realistic Surfaces in 3D Renders with PBR Materials
To achieve photorealism in 3D renders, using PBR materials (Physically Based Rendering) is essential. PBR ensures that the material behavior in your scenes reflects real-world surface characteristics, leading to accurate and visually convincing results.
What are PBR Materials?
PBR materials are built using maps such as Albedo (Base Color), Roughness, Metalness, Normal and sometimes Ambient Occlusion. These maps define how a surface interacts with light, allowing it to reflect, absorb or scatter light realistically depending on its texture and material type.

Advantages of Using PBR
Consistency: PBR materials behave predictably across different lighting setups and engines like Unreal, Unity, or Blender.
Realism: Surfaces appear more tactile and physically accurate, from glossy metals to rough concrete.
Efficiency: Once set up properly, PBR materials reduce the need for trial-and-error in shading.
How to Use PBR Materials in Your Workflow?
- Collect or create high-quality PBR texture maps from trusted sources.
- Apply each map to the correct material input in your 3D software (Albedo, Roughness, Normal, etc.).
- Use linear color space for accurate rendering results.
- Adjust values to suit your lighting and scene context without over-editing.
Benefits of Using PBR Materials
- Real-world Accuracy: Materials behave predictably in all lighting conditions.
- Consistency: Seamless results across different render engines and real-time environments.
- Time Saving: Standardized workflow makes it easy to swap materials and test new looks fast.
Best Practices for Texture Accuracy
- Use High-Quality Maps: Always work with 2K or 4K texture maps from reliable sources like Quixel, Poliigon, or Substance.
- Maintain Proper UVs: Unwrap your models correctly to prevent stretching or tiling issues.
- Normal vs. Bump: Use normal maps for detailed surface depth without increasing polycount.
- Calibrate Roughness: Roughness controls reflectivity—lower values for glossy, higher for matte surfaces.

Common Mistakes to Avoid
- Mixing PBR and non-PBR materials: Causes inconsistency in lighting behavior.
- Incorrect scale: Wood grain or bricks too large/small ruin the realism.
- No AO map: Lack of ambient shadows flattens your material’s realism.
websites that publish free PBR material content: Poly Haven, ambientCG
Conclusion
When building photorealistic 3D renders, PBR materials offer a powerful and standardized approach to texture realism. With correct map usage and attention to detail, you can make any surface—from brushed metal to cracked stone—look truly lifelike.
Mastering Camera Settings for Realistic 3D Renders
To achieve photorealistic results in 3D rendering, mastering camera settings is just as important as lighting and materials. Simulating real-world lens behavior like depth of field, motion blur, and exposure settings brings your scene closer to photographic realism.
Why Camera Settings Matter in 3D?
In photography, the camera’s lens and exposure settings directly affect the look and feel of an image. The same rules apply in 3D. Settings like aperture (f-stop), shutter speed, and ISO control focus depth, motion, and image noise, creating believable renders that feel captured rather than created.
Essential Camera Settings for 3D Rendering
- Aperture (f-stop): A lower f-stop (e.g., f/2.8) creates shallow depth of field, blurring backgrounds naturally.
- Shutter Speed: Slow speeds (e.g., 1/30) add motion blur, great for moving objects or dynamic shots.
- ISO: Controls sensitivity; higher ISO can add realistic grain but too much leads to noise artifacts.


Pro Tips for Camera Setup
- Use real-world lens equivalents (like 35mm, 50mm) for familiar perspectives.
- Activate Depth of Field (DOF) and fine-tune focus distance to guide the viewer’s eye.
- Simulate slight lens imperfections like vignetting or chromatic aberration for more authenticity.
Common Mistakes to Avoid
- Exaggerated DOF: Unrealistic blur can break the realism and make renders feel artificial.
- Incorrect ISO: Over-noising a clean scene reduces clarity and distracts viewers.
- Neglecting focal length consistency creates unnatural proportions.
Conclusion
Mastering camera settings transforms 3D renders into images that look captured through a real lens. By carefully tuning aperture, shutter speed, and ISO, and embracing subtle imperfections, you can dramatically enhance the realism of your 3D artworks and animations.
Mastering Composition Techniques in 3D Renders
Strong composition is the secret ingredient that transforms technically accurate 3D renders into visually striking artwork. Applying rules like the Rule of Thirds and Leading Lines guides the viewer’s eye and builds a natural, pleasing visual flow.
Why is Composition Important?
Even with perfect lighting and materials, a poorly composed render feels flat or confusing. Composition techniques bring order, meaning, and emotion to your scene, making it instantly more engaging and memorable.
Key Composition Techniques
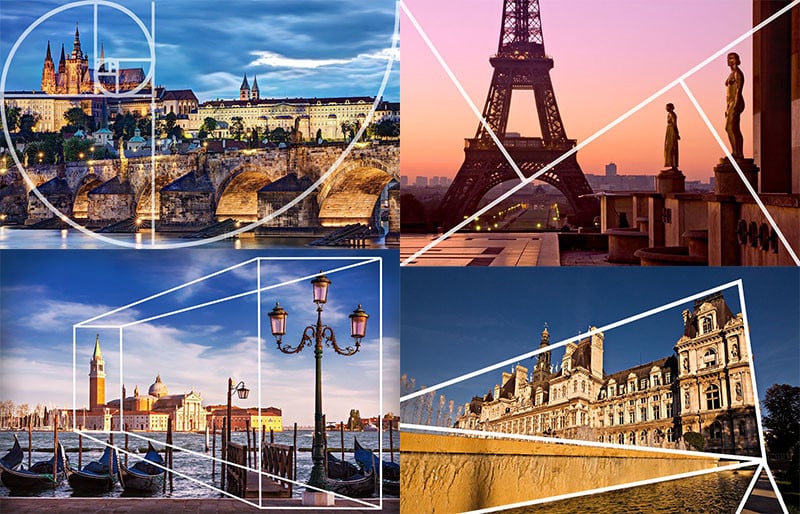
- Rule of Thirds: Divide your frame into 3×3 grids and place key elements along these lines or intersections for balance.
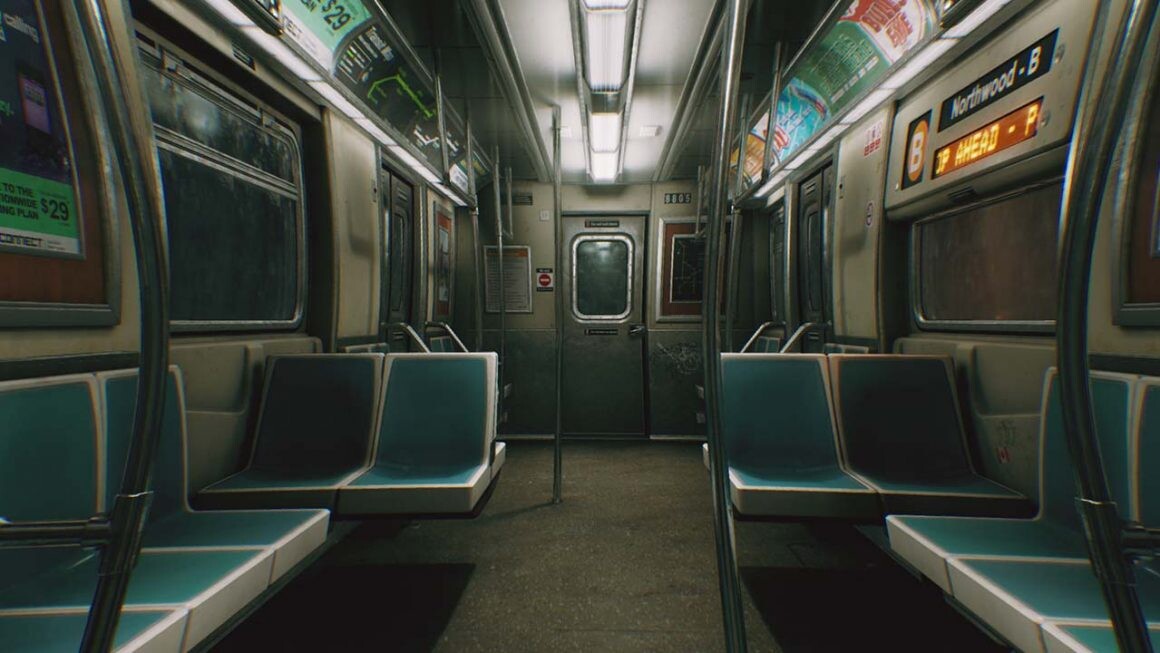
- Leading Lines: Use natural or created lines (roads, rivers, architecture) to draw the viewer’s eye towards the subject.
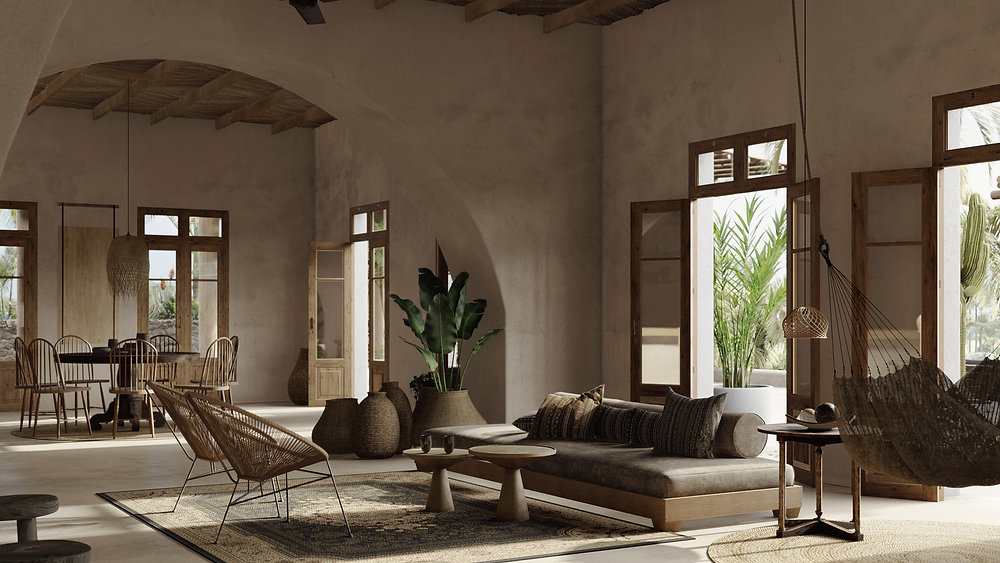
- Framing: Use environmental elements like windows or arches to frame the focal point naturally.
- Negative Space: Leave empty areas to highlight the main subject and create breathing room.

Tips for Better 3D Composition
- Sketch simple composition thumbnails before you build the full scene.
- Combine multiple techniques—leading lines + rule of thirds often work beautifully together.
- Always ask: Where do I want the viewer’s eye to go first?
Common Composition Mistakes
- Centering everything: Makes scenes feel static unless used intentionally.
- Too much clutter: Confuses the viewer and weakens the focal point.
- Ignoring background: A messy background distracts from the main subject.
Conclusion
Perfecting your composition skills elevates your 3D renders from technically good to emotionally powerful. By applying classic techniques like the Rule of Thirds and Leading Lines, you can create captivating visuals that tell a story and hold the viewer’s attention.
Bringing Life to 3D Scenes with Global Illumination
Global Illumination (GI) is essential for creating realistic light propagation in your 3D renders. It simulates not only the main light sources but also their effects as they bounce off surrounding surfaces. This mimics the behavior of light in the real world, giving your scenes a natural ambiance.

What is Global Illumination?
Global Illumination is a rendering technique that calculates the indirect lighting that occurs when every surface in the scene reflects light. This softens harsh shadows, brightens dark corners, and creates more natural contrast transitions.
Why Indirect Lighting Matters
- Realism: A single light source does not illuminate the scene. Light reflections from surfaces complete the realism.
- Depth: Thanks to light bounces, objects appear more volumetric, and the scene looks deeper.
- Color Interaction: Surfaces affect each other’s colors. For example, a red wall might give a nearby object a subtle red reflection.
Setting Up Global Illumination
- Enable the GI engine in your 3D software (e.g., V-Ray, Arnold, Cycles, Redshift).
- Configure the “Bounce Light” settings to have at least 2-3 bounces.
- Use methods like Light Cache or Path Tracing to achieve high-quality results.
Optimize Your Renders
- Excessive bounce settings can increase render time—use them in moderation.
- To speed up renders, add ambient occlusion or denoise filters.
- Start with low-resolution test renders before moving to high-quality ones.
Conclusion
Global Illumination adds light physics-based realism to 3D renders. By considering how light moves throughout the scene, not just where it originates, you can elevate your visuals to the next level.
Micro Details and Imperfections: Adding Realism Touches
In 3D rendering, adding micro details like dirt, fingerprints, scratches, and surface wear can make a significant difference. In the real world, nothing is “perfect,” and it’s these small imperfections that give objects their authenticity.
What Are Micro Details and Imperfections?
Micro details refer to the subtle, often overlooked features that naturally occur on surfaces over time. These include small imperfections such as fingerprints, dust particles, scratches, and weathering effects that make the object look used and realistic.
Why Imperfections Matter in Realism
- Authenticity: Perfectly smooth surfaces often look unnatural. Imperfections add depth and character to objects, making them feel real.
- Visual Interest: Small details like scratches or dirt can break the monotony of a clean surface, making it more visually engaging.
- Wear and Tear: These imperfections suggest that the object has been used or aged, enhancing the sense of time and history in the scene.
How to Add Micro Details and Imperfections
- Use texture maps like dirt, scratches, and fingerprints to add depth to your models.
- In Substance Painter, create wear effects by painting areas of the model that would naturally accumulate imperfections.
- Layering details is key: Apply multiple layers of imperfections for more realism.
Optimize the Look of Imperfections
- Subtlety is key: Too much imperfection can overwhelm the model. Keep it balanced to maintain realism.
- Use ambient occlusion and bump maps to add depth to scratches and dirt.
- For realistic lighting, ensure the shading accounts for these imperfections, making them appear naturally integrated into the surface.
Conclusion
Adding micro details and imperfections is a key technique in creating realistic 3D renders. These subtle touches give your models a sense of history, use, and character—making them look much more lifelike and believable.
Correct Scale and Proportions: Preventing Visual Distortion
In 3D design, ensuring correct scale and proportions of objects is crucial for achieving realism. Whether you’re working on a character, environment, or small prop, the right size, camera distance, and FOV (Field of View) settings make a huge impact on the final look. Proper scale helps avoid visual distortion and creates a more believable scene.
What Is Correct Scale and Proportions?
Correct scale refers to making sure that objects in the scene are sized appropriately relative to one another and to the overall environment. Proportions deal with the relative size of various elements of an object, such as a character’s limbs or the size of a building compared to its surroundings.
Why Correct Scale and Proportions Matter
- Realism: Proper scale ensures that objects behave like they would in the real world. A character with disproportionate arms or a car that is too small will break the viewer’s immersion.
- Visual Cohesion: Accurate proportions create a harmonious balance in the scene, making it feel natural and believable.
- Prevention of Visual Distortion: Incorrect scale or proportions can cause optical illusions, making objects appear larger or smaller than they should be, which distracts from the scene’s realism.
How to Set Correct Scale and Proportions
- Use real-world measurements: Referencing real-world objects or architectural blueprints can help you establish the correct size for your models.
- Consider camera distance: The Field of View (FOV) of your camera impacts how objects are perceived. A wide FOV can distort objects, making them appear stretched, while a narrow FOV can compress them, leading to a less dynamic scene.
- Maintain human scale: If you’re designing a human character, ensure the proportions follow natural human anatomy, such as the head-to-body ratio.

How Camera Settings Affect Scale and Proportions
- FOV settings: Adjusting the FOV can either enhance or ruin your scene’s proportions. A higher FOV will exaggerate the perspective, making objects appear smaller in the distance. A lower FOV might cause the objects to look more distorted or unnatural.
- Camera angle: Experiment with different camera angles to highlight the scale of your objects and prevent unwanted distortion.
- Depth of Field: Use depth of field (DOF) to focus on certain objects in the scene, which can help emphasize scale and proportions, making them appear more realistic.
Conclusion
Setting the correct scale and proportions in 3D design is key to preventing visual distortion and creating realistic, immersive scenes. With proper attention to the camera settings, object size, and relative proportions, you can achieve lifelike renders that captivate your audience.
Click on the link to read other blogs

